here's how I got started...

here's how I got started...
a 20 minute podcast by Crazy BeYOUtiful

Friday, November 30, 2012

change of plans...

I intended to post a project today using my 
however...

since I'm starting to work on this post at 5:30AM...
it's really dark out &
 I neglected to take a photo of the finished piece...
duh...

so...that will be a post for next week...

instead...
moving on to...

plan B...
I'll show you how to make this large Christmas ornament...
it's a whopping 7 1/2 inches tall...
this was soooo much fun!


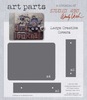
I used just the solid base from the art parts large packet watch...
there are 2 solid bases in the package...
so, you could work on 2 at once...

like the old commercial...
double your pleasure...
double your fun...

you could also use the frames & cut your own base...
that would allow you to make 4 ornaments from the package...


you'll want some of my white embossing paste...


a little goes a long way...

but I will NEVER run out...
EVER!


below shows how the base started...

first, stain the base with tumbled glass distress stain...
I used 2 layers for a brighter color...

I cut a snow bank template from scrap cardstock & laid that in place, then added the white embossing paste...
to the bottom of the ornament...

remove the template, 
scrape the excess paste off the cardstock & return it to the jar...
then sprinkle the wet paste with the rock candy glitter...

when that was dry, I stamped Merry Christmas with jet black & embossed it with clear embossing powder...

then stamped 2 of tim's snowflakes, multiple times 
(remember I worked in surgery...so I chopped the stamp apart to use the tiny snowflakes individually)

then edged the ornament with the same pewter stain...
 I stained the ornament top also...

 to add texture to the top of the ornament...

the branches were stamped with olive archival...

the edge of the ornament was darkened with chipped sapphire, using the blending tool...


to stamp with stains, you want the dabber top fairly dry...
***just a little hint...***


I stained the 2 art parts flowers with barn door stain & stamped them with polka dots...
the fern art parts were stained with
lol...
that seemed an appropriate color choice...

they were stamped with jet black & the houndstooth stamp...


I had scraps of my Clearly for Art, which was covered with vintage dictionary paper, so I used that for the snowman...

I stamped the snowman 2 times...
used one full image & chopped the second to get extras of the hat & face & scarf...

I covered the hat with the black embossing paste & lightly sprinkled it with the dry rock candy glitter...


here's what he looks like...

his scarf was inked with the tumbled glass marker...

his hat is embellished with tinsel twine

I painted a thin layer of rock candy stickles over the whole guy & when that was dry, I added shading to the edges with pumice stone stain, using the water brush...

he's very dimensional...
after you heat the CFA & shape him, the hat & the scarf...


oops almost forgot...
I added the word snowman after it was inked,
 with the tumbled glass marker...

how did we live without the markers?
I use them every day...
if you don't have them...
maybe Santa will bring them?

 I added a long fastener to accent the saying...

 here's the finished piece again...


I think this will look cool hanging 
inside a large fresh wreathe on the front door...

this is a great "double dipper" project...
you have fun making it & 
a special someone gets a fun handmade gift...

plus...
 an added bonus...
since it's made with art parts & CFA...
it's simple to pack away for next year, without fear of it being squished...

OK...answers to a few questions...

#1...I live in the middle of nowhere & must order on line. if the embossing paste freezes will it be ruined or will it be OK?

I had to do investigating on this one...
here's the answer, direct from our supplier...

it can freeze & thaw 3 to 4 times, without affecting the quality of the paste...
let it come to room temp & DO NOT heat it to thaw it...
good to know!

#2...did you use the stains full strength in the misters when spraying the wet embossing paste...
YES! 
but you could mix your own concoction with reinkers & water...
but keep in mind, that since the reinkers have been mixed with water, they will not react again if you want to use them for techniques on art journal pages...
that's why I used the stains full strength in the mister...
easy & always ready for action...

#3...will the pastes work with Dylusions sprays?
you bet they will!

#4...I have color washes. can I use them instead of the stains with the paste?
you bet! 

 #5...did you cover the CFA with paper so the paste would stick or because you wanted to see the text?

the paper gives the paste tooth to grab on to...
but I have painted the CFA with Glue N Seal & then applied the paste...
that will work too...

back to the paper part of the question...
if you apply a thin layer of paste, 
you get the added benefit of the text showing thru...

the more layers...
the better your art will look...

I think that's all the questions I received...
if I missed anyone, please let me know...

here's another take on embossing paste snow...
this time it's applied as an accent, only on the edges...

this is up on the Sizzix blog & was created by Eileen Hull...
she totally transformed her cupcake holder die into a tree...

look how cute!


ok...that's it for today...
I hope you enjoyed the pocket watch "turned ornament" tutorial...

and that you are inspired to...

make art!
wendy
PS...GO BEARS!

WAIT...did you notice?
no brown inks were used on this piece...
I know...SHOCKING!


Monday, November 26, 2012

my embossing paste LOVES tim's distress...


because I totally LOVE all tim's distress inks in any form,  
the embossing paste I chose 
HAD to play well with distress...
and it does...

below is one of my very first embossing paste projects...

I did one project & I was HOOKED BIG TIME...
I love the texture the paste creates 
& it's a whole different way 
to use stamps, Clearly for Art, art parts & dies...

I'll tell you how I created this...


first off...

I had this idea that I would LOVE to be able to 
spray 
distress stains...

I REALLY wanted to use them on art journal pages ...
like I did on this one...


and then I wondered about spraying wet embossing paste 
with distress stains...

so...I popped the top on several distress stains & 
put them into misters...
***make sure to label them***

if I was IN LOVE with the distress stains before...
let me just say
these sprays are the BOMB!


on to the art...

I used the palette knife to apply an uneven layer of white embossing paste over the art parts oval insert...
making sure to leave some areas uncovered...

then I misted the wet paste with these distress stains...
I used some peeled paint, faded jeans,

next I used this background to stamp into the wet paste...
it's a good stamp for the paste, since the text is larger & farther apart...
(clean your stamp immediately with water)

normally I mist my stamp with water before stamping into the wet paste, but there was enough stain on the paste that it wasn't necessary this time...

after the paste was dry, I inked the insert edges with walnut stain, using the blending tool...

and the insert looked like this...


then, I used my 3 fresh flowers stencil to add the flower, again with white embossing paste & set that aside to dry...

the flower was colored with mustard seed stain
using the detail water brush...
if you don't already have it...
add it to your Christmas wish list...
I LOVE it...

to get the pattern on the dry flower, I put the stencil back in place, then I inked this background with jet black archival & stamped over the flower...
to create this *double embossed* flower on the background...

look how cool...


while the paste was drying I used the black paint dabber to paint the art parts fancy oval frame solid base...
and inked the frame with brushed corduroy distress stain & added some walnut stain along the edges...
I added a bit of random stamping & stenciling...
and here's the result so far...


this next tidbit blew me away...

I didn't think the embossing paste would work 
with my Clearly for Art...
but it does & 
it makes AWESOME 
dimensional 
un-smashable 
flexible
 embellishments...
and the paste does not pop off or crack!

to create the flowers below, 
I used Glue N Seal to apply
 a vintage dictionary page to the CFA...
then I covered it with a layer of white embossing paste & set that aside to dry...

when the paste was dry, 
I die cut 2 flowers, using tim's tattered florals die, 
then inked the flowers with weathered wood & scattered straw, using the blending tool...
 stamped them with jet black archival...
then I heated the CFA to soften the material & shaped the flowers...
make great flower centers...

here's a better look...


to finish it off, I inked the art parts flourish with peeled paint stain & stamped it with jet black archival & my screen stamp...
I glued it all together with Claudine's multi-medium...
LOVE the matte the best...
and added my little Blossom Bucket crow

here's the finished piece again...


now are you wondering why I put the stains into misters?
 this is what happens when you 
spray the wet paste with barn door  stain...
you get
beautiful intense color...

below...
same white embossing paste...
same barn door distress ink...
but this time the barn door is added 
over the DRY paste with a blending tool...

you get a much lighter color...
I love this too!


this is what I am LOVING about the embossing paste combined with the distress...
you have so many options...
and we can still use the archivals too...

I have so many ideas...
and so much brewing in my head that...
I can hardly sleep...

hey...
I hear the wheels turning...

if you are wondering about misting 
YES... DO IT!
it's AMAZING & soooo shimmery pretty!
mist it over wet or dry paste...
both work well...


I've had quite a few questions about using the pastes...
so I'll do the Q & A in the next post...

until then...
I must find some chalk...

can you believe that we have NO chalk in this house?
SHOCKING!

I have a project to share that makes a GREAT holiday gift...
but I NEED chalk...

so I can...

make art!
wendy
ps...what ideas do YOU have brewing?


Friday, November 23, 2012

SUPER SALE!

here's a HEADS UP...

and a SHOPPERS ALERT...

LOTS  of cool art supplies are in the BLACK FRIDAY SECTION over at SIMON SAYS...
***EDIT***
click on the product title
(not the photo)
to be magically transported...

I use these all the time for the base of my project...


even my brand new...
these are just the right size for stocking stuffers...
I have a fun tutorial coming soon, using the black paste...


 use the embossing pastes with this heart stencil...


and the perfect housing for your studio 490 stamps...
YEP...
it's 35% OFF!


it's a good time to stock up on Clearly for Art...
to use with the embossing pastes...


and tim's dry rock candy glitter makes perfect snow, when sprinkled over the white embossing paste...


there's even some Blossom Bucket included...

these brand new small star knobs...

and just in time for a fun New Year's card...


here's the code to get you the great discount...

SIMONBF35

there's a ton of products included in the sale...
buy them for yourself...
 or start your holiday shopping
 for friends & family...

I DID SHOP...
I love a good sale...

now it's time to...

make art!
wendy
ps...
go BEARS...
yeah...right!

YIKES...sorry for the blurry photos...
no time to edit...
I *think* I'm going back to look for bargains again...


Tuesday, November 20, 2012

and the winners are...

but first...

here's a peek at a tutorial I'm working on using the white embossing paste with...
my most favorite inks ever...

DISTRESS...

seriously...
these products are a match made in heaven!
this is the insert from the art parts fancy oval frame...
and the project starts out looking like this...


then I added 
embossing paste OVER dry embossing paste...
and then stamped this background in archival...
I am in LOVE with this texture......


stay tuned...
I'll get this tutorial done just as soon as I can...

without further ado...


both
embossing pastes
are going to...


winner #1...

Blogger ellen vargo said...
ooooh yes! would love a chance at winning some of the new pastes! the tags you've done are just FABulous. I especially love the snowman with both the black AND the white, covered with rock candy dry glitter - completely gorgeous! I wanna play! (fingers crossed!!!)

Ellen x
November 15, 2012 8:41 AM
 Delete


winner #2...
Blogger Gabrielle said...
Oh that snowman looks adorable! Such a clever, clever project and far more exciting to make than packing ever is! Have a wonderful weekend x
November 15, 2012 7:32 AM
 Delete

winner #3...

Blogger jackib said...
I love snowmen and would really love to win your embossing paste so I can paste all the little snowmen I have - stamps, dies, etc!!! Thanks, Wendy - great tutorial. :-)
November 17, 2012 11:18 AM
 Delete

HUGE congrats to the winners...

just shoot me an email with your addresses & 
we'll get these off to you so 

YOU can...

make art!
wendy

Thursday, November 15, 2012

I was supposed to be packing...


***edited with paste links below***

my demo supplies...
and all the make & take goodies...

but the embossing pastes were calling me yesterday...

seriously...
I heard them loud & clear...

these are 2 quickie tags that use my pastes...

several people asked about "paste snow"...

so here you go...

is all decked out in white embossing paste
& the yummy...
and he has a textured black paste hat...


here's a little tutorial...


the base is a Ranger #8 kraft tag...


I used vermillion archival to stamp this holiday background over the tag...
then jet black archival to stamp the greeting and
 the polka dot border at the top of the tag...

to accent the tag edges...
and to randomly stamp the spatter stamp over the tag...

to create frosty...
I adhered a vintage dictionary page to a sheet of Clearly For Art, using Glue N Seal...
then die cut the snowman & the snowflake...

I used the palette knife to unevenly apply the white paste over the snowman, skipping his hat,
 then sprinkled the wet paste with 
the dry rock candy glitter...
and set it aside to dry...

I used a scrap of the same paper covered CFA 
to die cut a second hat, 
then applied an uneven layer of the black paste to the hat & set it aside to dry...

the snowflake was lightly inked with brushed pewter distress stain...
it adds just the right amount of shimmer...

***make sure to shake the stain well***

when the snowman was dry (about 25 minutes?), I used the blending tool with brushed corduroy to accent the edges...
then used the rusty hinge marker to color his nose...

to make him more dimensional, I heated the CFA to soften the material and shaped him, to make him more rounded...

I added tim's tinsel twine to the hat after I heated it a bit to shape it and I also used it to make a scarf...
oops and added tim's star before tying the scarf...
then I glued the extra hat in place, for a little extra dimension...

the snowflake was also heated so I could shape it too...

a tiny fat glue dot is under the snowflake, so it's raised...

I added 2 black lines with the 
Stabilo pencil and a bit of doodling...

then glued grunge scraps under the snowman, 
before adding him to the tag...

here's a look at how cute his textured hat is...


and here's a better look at the rock candy/paste snow...
it's vintage shimmery goodness...


***if you want to add rock candy glitter to dry embossing pastes,
 just brush on a thin layer of Glue N Seal (matte) & sprinkle away!***


I think these snowmen would be adorable without the tag as package toppers or as ornaments for the tree...
and because they are on Clearly for Art, 
they'll be easy to pack away for next year & they won't get squished...

this would be a fun children's project too...

 I couldn't leave the studio until
 I used some more of the black paste...

this is a #5 manila tag...
I think I'll add it to the Thanksgiving hostess gift...
with a gingham bow...
you didn't think I was cooking did you? lol...


I used the palette knife to add a THIN layer of black paste, 
NOT covering the whole tag...
then I misted this stamp with water...
and stamped into the wet paste...

***always mist your stamp 
before stamping into the wet paste***

I cleaned my stamp immediately & set the tag aside to dry....

the paste was applied much thinner, so the drying time was less...

***note***
you'll see that the black paste is much thinner than the white...
a tiny bit goes a VERY LONG way...

***make sure the paste is dry...
you don't want it on your distress stain dabber top***


once the paste was dry, I went over the whole tag with the wild honey stain and ended up with this...


were inked with peeled paint stain & stamped 
with jet black & this background...

the art parts flower was stained with rusty hinge & stamped with the polka dot background...

to alter the Blossom Bucket heart, I misted it heavily with heirloom gold Perfect Pearls mist & dried it with the heat tool...

magically, Perfect Pearls mist sticks 
to my Blossom Bucket resin pieces...

I chose my chit-chat words & lightly inked them with walnut stain on the blending tool...

everything got glued in place & I have a tag that was simple & FUN...
I love the #5 smaller tags to attach to gifts...

the pastes have shipped & I'm hearing from stores that they are jumping off the shelves...

YIPPEE!!!
cool! we'll have fun on the coming dreary winter days...

 check your LSS or they I heard they have arrived on line...

the white at ePaperie


the black... at ePaperie


I had several questions about the Madison convention...

am I doing classes???

SORRY, no...
but I'll be demoing all day Saturday & all day Sunday too...

will we have the new distress stains available?
YOU BET we will!

will the pastes be available?
YES for sure!

and remember...
if you tell me you are a blog friend, 
I'll have a little something for you!

belong to my group?
let me know & you'll get a little gift too!

let's celebrate with a giveaway...

 if you would like a chance to win some of my embossing pastes...

just leave a comment & 
I'll choose a winner or 2 or maybe even 3
 on Monday @ 7am Chicago time...

I may not post until Tuesday...
I'm not quite sure, so don't think I forgot you!

now I best get packing...

but I'd really rather...

make art!
wendy