here's how I got started...

here's how I got started...
a 20 minute podcast by Crazy BeYOUtiful

Friday, June 29, 2012

4 for Friday...

try to say that 10 times...
yikes!

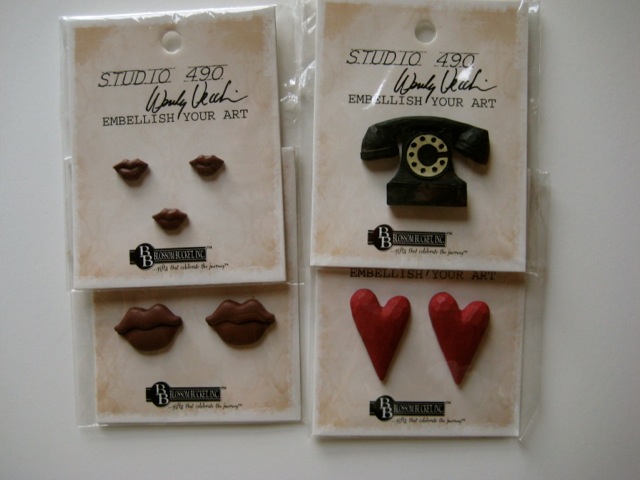
I get this question with every new stamp release...

"where do the ideas/inspiration come from?"

most times it's when I'm working on something, 
I think...
duh...we need a________.

or if I had this, we could use it like this...
or...

I wish I had a _____...

sometimes a specific occasion puts a little spark in my brain...

for example, if I need a card for a wedding...
or a funny one for a friend...
or if someone has accomplished something special...

these thoughts resulted in some *items* and stamps for this new release...

coming soon to a blog near you...

keep in mind that NOT every day is good in the studio...
just like every artist friend I speak with, some days there are no ideas...

there's nothing in the studio that inspires me...

nothing!

I hate it, but it happens...
it makes me crabby...
imagine that!...
but now I realize the next day WILL be better and I WILL make more art!

I bet you all can relate...

back to the new release...

 here's another HINT on new stamps...
art journaling is very popular, as are SMASH books...
I had that in mind, when designing this release...

and another...
since I'm IN LOVE with tim's new markers...
LOTS of the stamps were designed to be used with the markers...

as were some of the new art parts...
the distress markers make it so easy to add more detail to stamped art parts...

ok...
on to the peeks...

love the Blossom Bucket top hat on the ___...
is that a new art part?
or 2?

it's the perfect fit...
LOVE IT...

the top hat also fits some new art parts...
ps...and it's so cute!
wait 'til you see...


this next one is pretty obvious...

the Blossom Bucket star was painted with
 the black paint dabber...
you can also easily change it to any color with alcohol inks...


totally IN LOVE with these...
totally...


and the final one for today...
these 2 are more FAVORITES...


I'll see you back here on Monday...
that's JULY 2nd...

the day the reveals start...

I CAN NOT WAIT TO SHOW YOU my new babies!

until then...
stay cool &
make art!
wendy
PS...if you're in the Orlando area this weekend...
Ted will be at STAMPFEST...
he's got the booth LOADED with lots of rubber...
lots of accessories...
and his demos are very FUN!
pop in & give him a hug from me!


Thursday, June 28, 2012

4 peeks on Thursday...

the photo below is a peek of a Blossom Bucket booth mascot...

she's an assemblage I created
using a mixture of
 19 art parts, 
10 Blossom Bucket goodies...
 6 stamps...

lots of distress stains & inks, my favorite archival inks...

and some idea-ology too...

the moral of this story is that art parts are interchangeable...
you just mix & match the pieces
and play until you create something unique...
that's how she developed...

I LOVE her so much, that she is becoming a late summer/fall workshop project...

here's a little peek...


hmmm...
looks like the photo below shows new stamps &
 I see several new art parts too...

again...
you'll see that I'm loving heat embossing...


this next guy was FUN...

and you'll see quite a few new products...


and the last for today...


record breaking temps are predicted for our area...

it's a perfect day to stay in the studio and...

make (CHA) art!
wendy

Wednesday, June 27, 2012

much larger PEEKS today...

the peeks continue...
here's a REALLY good one...

stamps, art parts, blossom bucket...

LOVE that the small glasses fit upside down & look flipping cool...
the bling is from black soot distress stickles...

see anything else peeking out?


a bit blurry...
but better than nothing...
and something to ponder...

these are super stinkin CUTE!


more stamps, art parts & ???...
lots to see in the photo below...

LOVE LOVE LOVE art parts,
inked with tim's distress markers...
simple magic...


I told you it wasn't an umbrella...

got any ideas???


I'll be waiting to hear your thoughts while I...

make art!
wendy

Tuesday, June 26, 2012

it's back!

I'm thrilled to tell you that 
is back in stock...
YIPPEE!

if you haven't seen it before, it's made in Ohio, by the Amish craftsmen there, which makes it very solid & sturdy...

here's a photo...

it has a whopping 14 inch square bottom tier 
and the top is 12 x 12...

it hold tons of supplies...
and it's 19 inches tall...

all 37 distress stains take up only about 25% of the bottom tier...
leaving lots of space for scissors, paint dabbers, crackle paints, adhesives, brayers,

which are ON SALE thru today only...

enter this SALE CODE  


I put my organizer on a turn table 
(Bed Bath Beyond etc), so that it spins...

but if you have a small space, it's nice that it can fit flush against the wall...
and it takes up less space...


next...
 today's peeks...

very fun project...
this is from book #7...


and another...
kind of small...but you can still see several THINGS...


and a really good one next...
you can see LOTS here...


LOVE THIS MILLIONS!


sorry...
not a lot of chit chat today...

THANKS for popping by!

gotta head to the studio to...
make (CHA) art!
so that I'll have more peeks for you...

wendy

Monday, June 25, 2012

from this to this continues...***edit with a sale***

I thought I'd show another "altering" 
of one of my Blossom Bucket pieces...

the photo below shows the large lacy flower...
right from the package & below it is the altered version...


here's a better look...
I painted the piece with the juniper paint dabber, making sure to get in the recessed areas...
then wiped the raised areas...
and dried the paint...

next, I lightly painted the raised areas with the gold paint dabber, then let that dry...

the finishing touch is the coffee archival pad, lightly swiped on the raised areas...
if any areas were too dark, I just wiped off the excess coffee ink with a paper towel...
and dried it...

again, this altering took about 3 minutes...
it's really pretty when you see it in person...
with a hint of the gold paint adding a bit of shimmer...


I've used this Blossom Bucket piece as a hat/hair,
 as a collar...

and here's a peek of the altered piece used on a ______...
the center is accented with a 
to add a bit more detail & dimension...


I accomplished LOTS this weekend...
that is a good thing...

some days in the studio are good & some are really good...

and some days suck, when I'm brain dead...
but we won't discuss that today...

this next peek is a VERY VERY fun project...
I . CAN. NOT. WAIT. 
to share this creation...


I LOVE it when things FIT...
here's my Blossom Bucket small bottle cap filled with 
a match made in heaven...

together they make a perfect_______...
oops...can't say just yet...


I was working on this next piece...
it was about finished...
but not quite right...
it needed a little something...
I had the idea to add a staple or 2, 
using the tiny attacher...

50+ staples later...
that's my motto...
if one is good...
50 is better...

even though art parts are very strong & sturdy...
the tiny attacher works well on them...


and I was sad when this piece was finished...

it was fun...
and a new technique was discovered...
I'll share this later...


see anything interesting?
got any ideas of what these peeks are?

happy MONDAY!
it's a perfect day to...

make art!
wendy
...EDIT...
just found out about a SALE
I thought you'd like to know...

25% OFF on tim's markers for today & Tuesday ONLY...

here's the CODE to enter at checkout...
that brings the price to an amazing...
$86.21 for all 37 yummy markers...
ps..I LOVE them & designed lots of my new stamps to use with them...
stay tuned...


Friday, June 22, 2012

from this to THIS...

it's the weekend!

yippee!
and only 3 weeks 'til I leave for CHA...

YIKES!!!!!!!!
phew...

I thought I'd show you some quick ways to alter some of my Blossom Bucket resin pieces 
with some of my most favorite 
tim & Ranger products...

here's the cute little Blossom Bucket bouquet, right from the package...


in the photo below, I used the dried marigold marker & the rusty hinge marker to color in each flower...
and I used the forest moss marker over the raised areas on the stem...

then accented the flower centers with 

2 minutes = total transformation...

make sure to dry these with the heat-it tool...

leave them on your craft sheet to heat them...
they do get a bit warm...

let them cool before taking them off the chart sheet...

you may need to dry them several times...

now it looks like this...


for this next example 
to create a multi colored bouquet...

HEY...
stop the press...
a whole peek???

remember...
what happens on the blog...
stays on the blog!


I showed you the bird before...


again...he was colored with the distress markers...

the tiny dots are vermillion archival...


this piece is fun to alter too...


but a little different ink was used here...
& applied it with the craft nib...

the flourishes were inked with lettuce PIGMENT ink...

you'll see it creates a much more chalky effect...
whereas the distress inks are translucent...
the pigments are much more opaque...

I randomly stamped on the raised areas with jet black archival...
and accented the flower center 

and now it looks like this...


 back to the distress markers...

I use stormy sky on the petals, and peeled paint on the flourishes...

you'll see the flourishes are a bit darker...

that's because I added a bit of rock candy distress stickles...

when I did that, the stickles activated the distress marker & made the color darker...and rewet it...
pretty cool in person...

this fun piece is glued to the small art parts pocket watch...
which I inked with pumice stone distress stain...

and there's a hint of a word stamp below...
which was colored in with the bundled sage marker...


other altering possibilities???

I didn't have time to make samples of them...
but you can also alter these with alcohol inks...
and archival inks...

use the refillable pen with the alcohol inks & a craft nib tapped onto the archival pads to add color...
now with the expansion of the archival colors...
we have LOTS of fun choices...

so the moral of today's post 
is that you have to look at the possibilities...

how can I easily make this coordinate with my project?

altering is FUN...

and speaking of FUN...

I hope you'll take 3 minutes & click on the link 
to see a very cool video...

it was created by Michele Hamilton, one of the owners of 
in Twin Falls, Idaho...

I'll be there in August & the video is their invitation to attend the event...

NEVER. EVER. 
have I seen such a cool invite...
EVER...

sure made my day!

with the attention to EVERY detail in this video...
I AM CERTAIN that this will be a very fun weekend...

I had a sneak peek of what's planned & I LIKE IT!

I hope you can join us...

ok...time to head into the studio...

gotta make (LOTS of) art!
wendy
ps...the Blossom Bucket prize package, from the previous post,
 is still here...
if I don't hear from the winner by Monday @ 7am...
I'll ask Cindy to draw another winner...
stay tuned!


Wednesday, June 20, 2012

more peeks & the Blossom Bucket winner...

it's Wednesday...
and time for more peeks...

you'll see the photos are getting better...

and larger...
and clearer...
it won't be long now...

this one is so stinkin'  CUTE...
even better than I expected & like I have been saying...
they all have AMAZING details...


this next one is exactly what I planned...
but when it arrived & I got to test drive it over some art parts...
it has several different uses,
which delights me to no end, 
since it was totally UNPLANNED...
one is down right hilarious...


this is NOT what you think it is...


these are in the top 3 all time FAVORITES...

I LOVE you so much
 item #51556...


and this is our dining table, which is now CHA central...
it's loaded with all the new art parts & Blossom Bucket goodies...
all brand new things for CHA...

I also put my finished samples here, divided up by which booth they are for...
and book samples sit there too, until they get sent to be photographed...

look hard...I bet you can see a few things...


I've had several ask about my gift item release with Blossom Bucket...

several asked what times I would be in the booth in Atlanta...
would I be signing the art???

boohoo...
I won't be going because the gift show starts on July 11, 
just 2 days before I need to be at CHA...

I thought seriously about going & believe me...
IT IS KILLING ME NOT TO GO...
but at best, I would have been there for only 12 hours...

and the final days before CHA are really crunch time, getting last minute details finalized...

Cindy is there now setting up the displays...
she emailed me this morning & said the display looks great & she'll have pictures for me when she gets back...

see...I torture you with peeks...
and I get paid back by Cindy...

I'm counting the hours...
'til I see them displayed...

keep in mind that I started designing the art 
back in AUGUST OF LAST YEAR...

so this is pure torture for someone with zero patience...

I can post the photos on the 11th, the day the show opens,
and show you what the figurines?? look like...

ok...moving on...

now for the winner that Cindy chose this morning...

HUGE CONGRATS to...

Blogger kate blue said...

when something is your "baby," picky is good! I love all of the ones I have seen (and used myself) so far and can't wait for the next reveal!!!
June 18, 2012 1:57 PM
 Delete


please email me with your shipping info (wbv1213@me.com)...
and the head of shipping & receiving...aka Rick...
will get the box off to you...

THANKS AGAIN CINDY...
for the awesome prize package...

you can bet I'll be sucking up big time @ CHA to get some samples of the new trinkets to share here...

and for sure I'll suck up to Ted to get some stamps to giveaway too...

now it's time to head back to the studio...
I gotta...

make art!
wendy


Monday, June 18, 2012

peeks & a Blossom Bucket GIVEAWAY...

I spent the weekend working on book projects...

I have to say that this is some of my MOST FAVORITE art that I have ever made...
EVER...

seriously...I had so much FUN...
I mean I worked REALLY HARD!

I can't wait to share...

I thought we could start the day with some
  NEW PRODUCT peeks...

lots of art parts, Blossom Bucket & stamps in the photo below...


more stamps & art parts, plus I see a peek of ______?


 oh...this next one is a good one...
2 Blossom Bucket, 3 stamps & a new art parts...

 now here's an EASY one...


did you notice that I've used clear embossing on these projects?

I've embossed on 10 of the last 12...
the reason?

I forgot how cool embossing looks, plus it makes it so easy to color in the images with tim's markers...

while having my coffee this morning,
 I was admiring my 19 
BRAND NEW embellishments 
from Blossom Bucket...

we're hoping for 20...
but #20 is proving to be a manufacturing nightmare...
yikes!

got my fingers crossed that #20 will be ready for CHA...

but here's a peek at the NEW 19...
I.  AM.  IN. LOVE!!!!!!

I expected cool...
but they have made these spectacular...
and I'm not easily impressed...
ok...picky might be the word I was looking for?

the detail is just amazing in these pieces...

they'll fit on cards, scrapbook layouts & altered art too...

plus they were designed with my stamps & art parts in mind...

 Cindy said it's too early for the full reveal...
let's just give them a little peek...

ok ...
here goes...
best I can do...


Cindy offered to do a
  GIVEAWAY to celebrate our new release...
I LIKE how she thinks!


I LOVE these because the clear bottle & jar were designed with a slit in the back, so that the flowers slip right in & everything gets glued down flat...

they're a perfect fit...

the bouquet is perfect for altering with tim's markers...
I'll do a post on that soon...
each flower can be a different color...
or you can make them all the same...

it's simple, quick & FUN...
and alterable to fit any project...


LOVE LOVE really LOVE the lips
the vintage phone (I'm so old I remember these!)
& of course...
the red hearts fit lots of occasions...


but wait...

there's MORE...
the lucky winner will also get these...

the antique silver buttons, the bird, the cute roof (can't find that link)

I showed how to alter the bird 

I LOVE to use the buttons for flower centers...
the roof also makes a funky hat for people...


so...one lucky winner will get all 12 packages!
THANKS CINDY!!!

what do you need to do to have this prize package live with you?

just leave a comment...
that's it...
simple...

I'll ask Cindy to draw the random winner on 
Wednesday...

and that person will receive 12 Blossom Bucket trinkets so that they can...

make art!
wendy
ps...yes I did notice that the links are red & blue...
I'm gearing up for the 4th!
off to the studio...got some ideas brewin'